Thursday, February 21, 2013

Pork Provencal

This is one of my favorite Pork recipes so I thought I would share it with you. Not only is it delicious but so easy to make too!
I hope the quality of my photos and the way the meal looks won't turn you away! I have been taking all my pictures with a portable device (ipod) and I was one potatoe short to cover the entire dish.


Preparation Time: 25 minutes and cooking takes about 2 hours

Freezing: This dish will freeze very well for up to 3 months. Freeze it before the final 30 minutes cooking time, then reheat by thawing and cooking uncovered for 1 hour at 350 degrees F.

Ingredients:

2 lbs Pork Fillets
1/4 cup Butter
3/4 lb onions, peeled and thinly sliced
15 oz can petite diced tomatoes
Salt and Pepper
1/2 tsp herbs de provence or dried mixed herbs
1 1/2 lbs potatoes, peeled and thinly sliced
1 tbsp chopped parsley for garnish

Instructions:

1. Trim the pork of any surplus fat and slace into thin strips

2. Melt half the butter in a large saute pan and gently fry the slices of meat, stiring continuously to prevent them from burning

3. Transfer the meat to a plate and set aside

4. Stir the onions into the meat juices in the saute pan and cook gently until just soft

5. Add the tomatoes to the pan along with the salt, pepper and mixed hearbs. Bring to the boil, then simmer gently for about 5 minutes, or until the sauce has reduced by about a third

6. Add the meat back to the pan


7. Arrange the meat mixture and potatoes in layers in an ovenproof serving dish, starting with the meat mixture and finishing with a layer of potatoes

8. Melt the remaining butter and brush the top layer of potato with this (I personaly cut the butter into small squares and lay them on top)

9. Cover the dish with a lid or foil, and cook in the oven for 1 and 1/2 hours at 350 degrees F.


10. Remove the lid from the dish and continue continue cooking for another 30 minutes to brown the potatoes.

Sprinkle with chopped parsely before serving.

Let me know what you think. This has become a staple at our house and we have shared it with many of our friends and family over the years.

Thank you for reading.

Tuesday, February 19, 2013

Shop Preview

I have been working hard these past couple of weeks....

Sneak-a-peek at what I have been making for the Craft Show at The Hampstead Women's Club in North Carolina on March 22, 2013. Any unsold items will be put for sale at my Etsy Shop (which is still under construction).

Hand painted Wood Signs


 Hand Painted and Distressed 22.5x7.25 Antiques Sign to hang your keys...

 
Hand Painted and Distressed  15.75x7.75 Beach Sign

Reclaimed Wood 23.5x3.5 Beach Sign


Hand Painted 16.5x8.5 Lake House Sign
*****
Metal Signs


These 6x9 metal signs are aged to look rustic and vintage


*****
Kitchen Tags


Personalized Kitchen Tags. These are sold in sets of 12 (Sugar, Sweetener, Flour, Self Rising Flour, Rice, Pasta, Coffee, Tea, Herbal Tea...) and come in two different shapes. Rectangular or Square. They are made to order and the wording can be whatever you like. It comes with an adjustable baker's twine to fit jars up to 8 inches in diameter.
*****

 Hand Painted Pillows

 
18x18
 
20x12

16x16 and 18x18   


These Pillows are hand sewn and hand painted to look like a vintage grain sack. I have more designs and sizes available.

Needle Felted Ornaments

 
These are just an example of the many kinds of ornaments I will be selling at the craft show. I also have penguins, Whales.


Traditional Hand Needle Felted Ornaments. Different styles and colors available.
*****
Needle Felted Pins or Hair Accessories 


These Flower pins are a great accessory to any jacket, scarf, purse or hair. It comes with a loop so you can slip a barrette if you would like to wear it in your hair and a safety pin for garment.
*****

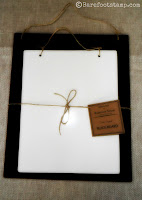
Hand Painted Rustic Chalk/White Message Boards

 
Need to leave a message? Use a white board marker on one side of this message board or for a more rustic look, use chalk on the other!
I have several sized available (8x10, 10x10 and 10x12) Also sold in sets of 2


If you can come to the craft show on Saturday March 23, 2013, please stop by my table! If you live out of state and can't make the long drive, consider visiting my shop on Etsy or email me if you would like to place an order.
Thank you for reading,


Wednesday, February 13, 2013

Valentine Mail Boxes


Turn plain and unfinished mailboxes from AC Moore into Valentine gifts for your children!


The mailbox above is my son's. It was stained with Minwax Provincial (available at Lowes) and left to dry for 24 hours. The following day,  I transferred the wording using a transparency method. Insert your transparency "paper" into your printer and print your design with the Mirroring Option so the words aren't backwards when applied to the wood. Put your transparency with ink down onto your wood and with a scrapper, apply pressure and rub all over the wording being careful to keep the paper in place to avoid smearing. Remove your transparency and wash it off for use at a later time.

NOTE: This transparency method is great and quick but be warned that if you are printing on an ink jet printer (as I am), the ink is water soluble.  This means that water based varnish cannot be used to seal your project as it will smear the ink everywhere.

After transferring the wording I applied a coat of Minwax paste finishing wax with a lent free rag and let it dry overnight. I love the rustic look of this mailbox. All is left to do, is fill it up with some chocolates and valentine notes.


This Mailbox is my daughter's. Her room is filled with white distressed pieces of furniture with pink accents so I thought her mailbox should look the same!
I painted her mailbox with acrylic snow white paint and the flag a pale pink color and let it dry for one hour. I used the transparency method for the wording on here too. Note the somewhat faded result. Painted surfaces won't let the ink penetrate the wood as well but this method worked out for this project since I wanted to give it a vintage look. After letting the ink dry, I just sanded the edges and the places where I wanted it to look worned and with a small brush I applied a little dab of Minwax provincial stain on the distressed areas to give it some color. To give your painted project a somewhat glazed look like I did,  just rub some generic baby oil over the stained areas making sure to wipe any excess oil. Once you have accomplished the look you want, apply Minwax paste finishing wax all over and you are done!

I love how these mailboxes turned out.