Tuesday, December 31, 2013

Eye Cream


I talked about the benefits of essential oils for your skin care and gave you an anti aging solution recipe in a previous post. If you are using this solution you may skip this eye cream since all you need for your face care is included in the solution. However, if you are continuing to use your daily moisturizers and night creams, and are interested in trying something new and natural, you may want to add this simple eye cream to your routine.

Ingredients:

1 oz Coconut oil
3 vitamin E capsules

Instructions:

Coconut oil will melt at 76 degrees. If you can, have a portion of your coconut oil melt and measure one ounce and pour it in a small clean glass jar. Pierce 3 vitamin E capsules with a needle and empty them onto the same jar. Close the jar tightly and shake it to give it a good mix. Since I keep the temperature of my house at 76-77 degrees, my solution will stay liquid. To get it to harden, I just keep the jar in the refrigerator and use it in the morning after I take my shower.

If you would like to read about the benefits of vitamin E and Coconut oil, please visit Ramblings of a Happy Home Maker. She gives great detailed information.

Thank you for reading.


Thursday, December 19, 2013

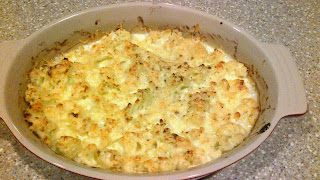
Cauliflower au Gratin


Great for winter

Ingredients:

One head of cauliflower
3/4 C Heavy Cream
2 T Butter
2 C Shredded Swiss Cheese divided
Salt and Pepper

Instructions:

Cut Cauliflower into chunks and wash under cold water. Pour cauliflower into a microwave steam dish (I use my pampered chef large steamer) add a small amount of water, cover and microwave on high for 5 minutes.


Meanwhile, Melt 2 tablespoons of butter into a saucepan on low,


Add heavy cream and stir. as the cream warms up, add 1 to 1.5 cups of shredded Swiss cheese. Keep stirring until the cheese is completely melted. Salt and pepper to taste.
Remove the saucepan from the heat and set aside.


Turn Broiler on, drain cauliflower and pour into a casserole dish.


With a knife, chop up the cauliflower into small chunks.


Pour sauce mixture over cauliflower, stir a little.


Sprinkle with remaining cheese.


Broil on high or low until top is golden.

Note: You can use more or less heavy cream, skip the butter, more or less cheese etc.... I usually eye ball everything so the measurements above aren't quite accurate. Sometimes, I have a large head of cauliflower that requires more ingredients, sometimes I only use half the cauliflower head if I am making this for only 2 people etc....

Play with this recipe and let me know what you think.

Tuesday, November 12, 2013

Pork Provencal remastered


I love pork and my kids do too but one of them is too picky and would not eat the oven version because of the potatoes so I thought I would re-master the pork Provençal recipe I had posted back in February and give it a try.

This recipe still calls for potatoes but they are somewhat hidden and it is stove cooked. Cooking time is cut tremendously and all the flavors are kept intact. So go for it and let me know your thoughts.

Ingredients:

2 lbs Pork Fillets
1/4 cup Butter
3/4 lb onions, peeled and thinly sliced
15 oz can petite diced tomatoes
Salt and Pepper
1/2 tsp herbs de Provence or dried mixed herbs
1 to 2 large potatoes, peeled and cut into 1/2 inch cubes
Vegetable oil for frying

Instructions:


1. Heat a large non stick skillet and add a couple of tablespoons or more of cooking oil. When the oil is hot but not smoking, add the potatoes to the skillet and fry stirring occasionally


2. When potatoes are golden brown and crunchy, pour them on a plate covered with paper towels to soak the excess oil and set aside.


3. Trim the pork of any surplus fat and slice into thin strips


4. Melt the butter in a large sauté pan and gently fry the slices of meat, stirring continuously to prevent them from burning

5. Transfer the meat to a plate and set aside


6. Stir the onions into the meat juices in the sauté pan and cook gently until just soft


7. Add the tomatoes to the pan along with the salt, pepper and mixed herbs. Bring to the boil, then simmer gently for about 10 minutes, or until the sauce has reduced by about a third.

8. Add the fried potatoes right before serving and give it a good stir. This step should be done at the very end of the recipe in order to prevent the potatoes from loosing their crunch.

Serve with a side of roasted asparagus or steamed broccoli


ENJOY!

Wednesday, November 6, 2013

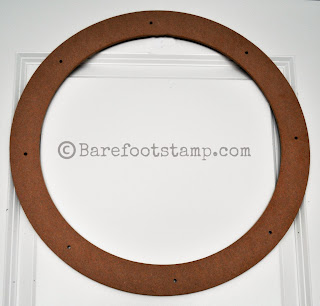
Fall Wreath


What can one do with so many corks......

a ....WREATH!
Materials:
 
1 flat hardboard large wreath (or whatever size you like - mine was purchased at Michaels)
40 wine corks (you may need more or less depending on the size wreath)
Hot glue gun
Sharp knife
Cutting mat
Instructions:
 

1. Cut each cork into 7 thin discs and set aside

2. Glue the cork pieces to the wreath frame with your hot glue gun in a pattern making sure to cover as much as the frame as possible and add another layer on top of the first one to cover the gaps.


Voila!


It took me only one hour to make from start to finish.  Add bows or other wine or fall related items if you prefer a more fancy look. I just like my wreaths simple.

You can hang it on your front door for fall or above a wine cabinet or bar the rest of the year.

So...start saving those corks right away and let me know what you think.

Monday, October 21, 2013

Master Bath Re-Do


Greetings!

Here is a project I have been working on. I am not quite finish with it but wanted to give you guys a sneak peek!

Builder grade bathroom mirrors are always so large and plain so I decided to build a small bookcase to give a more separate distinct look to our sinks.

I still need to frame each mirror with case molding as well as paint the walls and maybe even add some beadboard wainscoting... but you get the idea!

Materials:

Wood boards without knots. (I chose Aspen and I only needed 2 pieces. Each board measured 4'x7"x1")
Crown Molding
Baseboard Trim
Fiber Board Backing
Nail Gun
Trim Nails
Liquid Nail
Wood Putty
Kreg Jig Tool
Kreg Jig Screws
Kreg Jig Pocket-Hole Plugs
Jig Saw
Circular Saw
Sand Paper
Paint of Choice

Instructions:


1. Measure the height from the sink counter to the top of the mirror and the space between your two sinks.
I needed my bookshelf to be 45'' H x 15'' W x 7'' D to fit that space without being too cumbersome or too narrow/too long.


2. Cut one of the boards into 4 pieces measuring 12.75" each with the circular saw and set aside
cut the other board to measure 45 Inches
Follow the instructions on your Kreg Jig and drill 2 holes on the right and left side of each small board. 


3. Measure the height and depth of the back trim of your counter and with a jig saw cut out the piece at the bottom of both side boards so that your bookcase rests against the mirror without any gaps.

4. Sand all boards


5. Attach shelves to sides. I used a small piece of wood to keep my shelf board square and held it all together with a clamp. (Note: if you are working alone, Kreg Jig has a special clamp that will fit in the hole on one side and lays flat on the other side so it can stabilize the two pieces together while you screw in the wood screws)

Screw the top shelf with holes facing up so you don't see them underneath. All other shelves should have the holes facing down. Cover the holes with Kreg Jig pocket-hole Plugs


Special Note: I wanted the bottom shelf to be at the same level as the back trim so I had to rip the shelf and make it only 6.25" deep instead of 7". You can skip this step! (I like to complicate things a bit)


6. Attach Crown molding and baseboard trim. Sorry, I had camera problems and could not document this step. You can purchase a crown molding kit from Kreg Jig to help give more precise cuts if you are a beginner. Since I only had four 45 degree angle outside corners to cut, I had no problems using only the circular saw.
Glue the baseboard trim and nail gun it together. Putty the holes and gaps if you have any and let dry for a few hours.
Do the same for the crown molding.

7. Prime and paint your books case.