Wednesday, December 17, 2014

Photo Glass Ornament DIY


I have been giving these for Christmas for years!

Supplies:

Glass ornament
Transparency printable paper (make sure it is ink jet if that is the type of printer you have)
Printer
Circle cutter or scissors
Pencil

Instructions:

If you do not know the diameter of your ornament, you can find it by measuring its circumference and dividing it by pi (3.14).

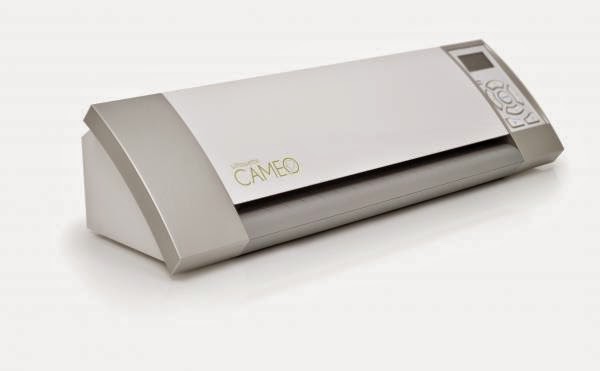
Choose a picture for your ornament and make sure the size fits the diameter of your ornament. What this means is that the subject needs to be centered so that the entire circle fits in the picture. You might have to enlarge or shrink the photo. I used to make these on a word document a long time ago by inserting an image on to my document and creating a circle the size of the circumference of the ornament. I would play with the size of the photo until it fit right in that circle. I then, deleted the circle I had drawn and hit the print button. I could fit up to 6 pictures on one sheet. The next step was just to manually cut each circle with the fiskars circle cutter. This part was a bit tricky and I sometimes had to start all over again. Figuring out where to position the cutter was a real headache! Having a silhouette cameo has been a time and life saver.

 
The picture on the left needs to be resized to fit the circle, the one on the right was perfect so I went ahead and used the intersect tool on the silhouette cameo to make anything outside the circle disapear.  There is no need to waist ink! 
All my pictures are now ready, I centered them to the page and inserted the registration marks for cutting. It is now ready to be printed

I like printing on transparency that way the photo can be seen on both sides of the ornament. Always print on the rougher side of the transparency.


Cut the picture using a fiskars circle cutter, your silhouette cameo or simply your scissors if you have steady hands. Mine are now cut with the help of my silhouette cameo. If you cut to photo too small it might roll around once in the ornament. If you cut it too big, it will bend a bit inside and won't look so good.

Roll the picture around a pencil

Insert the pencil in the ornament

Release the photo. At this point, you might have to adjust the picture around with tweezers. I always make sure I roll the photo around the pencil the way I want it to face in the ornament to avoid this type of tweaking.

Add the ornament cover and voila!


It can't get any simpler than this!

Friday, December 12, 2014

Christmas Decor

This is a time for decorating, sipping hot cocoa and warming up by a nice fire and I am doing just that today!


Christmas is almost here!

Handmade stockings. Thank you Betsy Barefoot


Snow balls


Silver and Gold

My favorite handmade ornament. Thank you Betsy Barefoot

Hubby's old train


Our Christmas Angel. Thank you Miss Joyce

Bells, bells and more bells

Foyer decor


Vintage skis


Felted Santa :-)

Simple Nativity Center. Thank you Betsy Barefoot

My latest craft. Bleached pine cones and glitter

Musical tree. Thank you Amy Barefoot

Tuesday, December 2, 2014

Living Room Tour


Like most open floor plans, the kitchen and the living room share the same space! I don't particularly like that concept and wish my kitchen was in a separate room but I am learning to work with that and trying to like it.

The living room is "almost" finished. I say almost because it won't look finished until the kitchen is to my liking. There is much more work waiting to be done in this dark space!

So for now....just ignore the "kitchen" background and take a sneak peak at our living room.

World Market Buffet made of exotic wood and lots of wine corks :-)

This common area is so frequently used, as you can imagine any gathering room would, which makes it almost impossible to keep it in perfect photographing condition. And let's not talk about the lighting today! The living room faces North and has hardly any light so I have had to use the over exposure feature on my camera!

Don't pay attention to the TV not being centered (I have been asking my Hubby to help me with that) or the somewhat Fall decorations existence (I am working on it as I am typing this).

A lovely antique Chinese cabinet given to me by my friend Benedicte

The Sofa is from Restoration Hardware,  the coffee table and plantation chair are from World Market. The white accent chairs are from Ikea.
Wall paint color is from Restoration Hardware and is called PUMICE

VOILA!

Monday, November 10, 2014

Ballard Designs SURF artwork Knockoff


I love this wall art but not the price.

At $316 per set for the small size and $676 for the larger set...

Wait, what? I can do this!

If you own a silhouette cameo or other cutting machine, you might just be able to make one of these!

This project only cost me less than $25 which is the price of the 4 frames I purchased at Michaels.
I already had the red and cream colored papers in a 12x12 size and followed the aging processed instructions described here (Baking the paper in the oven will cause it to curl a bit so all you need to do to get its original shape back is to iron it flat without steam).

Simple instructions:

I left the red sheets of paper as is. They have small sparkles spread all over (not visible on the photos) which I found pretty so I did not want to give them the same aged look as the ones on Ballard Designs.

I cut the letters out of the cream colored papers using my silhouette cameo machine before doing the antiquing process. Download SURF.studio files here (if you own a silhouette cameo machine).

I used an adhesive spray to attach the cutout letters to the red background papers making sure they were centered and finished this art project by framing them.

I absolutely love it! Of course it does not look exactly like the ones pictured above but you can achieve that same look if you want to spend more time in the aging process of the papers!


Hung them in a line above Aidan's bed for now but they will eventually be displayed in the playroom.


Your thoughts are always welcome!


Wednesday, November 5, 2014

Bean soup

Kidney beans and pasta combined to produce a filling soup suitable for all the family


This super easy delicious recipe is a real hit in our household especially in the Fall when the cooler weather settles in.

Ingredients:

15oz can kidney beans drained and rinsed
2 to 3 slices of bacon, chopped
1 celery stalk, chopped
1 small onion, chopped
1 to 2 cloves of garlic, crushed
1/2 cup plum tomatoes, chopped and seeds removed OR 1 15oz can petite diced tomatoes
1 Tbsp chopped fresh parsley or 2 tsp dried
1 tsp fresh basil or 1/2 tsp dried
4 cups water
1 chicken bouillon cube
Salt and pepper
1 cup small pasta


Directions:

Place bacon, celery and onions in a large saucepan and sautée over medium high heat for 3 minutes or until onion has softened and bacon is cooked. Add garlic and sautée for another minute or so. Place kidney beans, tomatoes, parsley, basil and water in the saucepan with the onion and bacon mixture and bring to a boil. Add bouillon cube, salt and pepper to taste. Cover and cook on a low heat for about 1 and 1/2 hours.

Raise heat and add pasta stirring well and frequently until pasta is cooked but still firm. About 10 minutes.

Serve immediately. You can add Parmesan shavings.


Enjoy!

Friday, October 24, 2014

Natural Body Lotion

Whipped Coconut oil and Vitamin E body butter

If you haven't already done your research about the many benefits of coconut oil, please get on it and read more about it here!
This oil is without doubt one of the most versatile and healthiest oils on earth.

There are several kinds of coconut oils:
Pure coconut oil
Expeller-Pressed coconut oil (which is deodorized)
Virgin coconut oil
Organic coconut oil
Organic Virgin coconut oil

I would highly recommend the organic virgin coconut oil which is the most expensive of all but if the scent bothers you, the organic (non chemical) expeller-pressed kind is a great alternative and a little less expensive.

This oil has no trans fats nor hydrogenation so it makes a great cooking oil as well. Just saying....

If refrigerated, this oil gets as hard as a rock but will melt at 76 degrees F. My home tends to be on the warmer side and keeping my eye cream at the right consistency is a bit challenging. The best way to solve this problem is to simply whip the coconut oil! 
Note: Liquified oil will not whip so make sure that your coconut oil is in somewhat solid form before trying the following recipe.


Adding Vitamin E to an already great oil just makes it even better!
The benefits of Vitamin E are too numerous to mention here but it is an antioxidant, a regulator of vitamin A, sun protector, anti-aging, treatment of scars etc... to name a few. To learn more about the benefits of vitamin E, visit the healthy skin care page.

Ingredients

1 Cup coconut oil (solid)
1 Tablespoon Vitamin E ( pock holes through the gel capsules to empty)

Instructions

Mix together with an electric mixer at medium to high speed for 6 to 10 minutes until the coconut oil reaches a fluffy and airy consistency. Store mixture in an air tight glass jar. Note: If your home is kept warm, the whipped mixture may liquify just a bit but this is perfectly normal. 

Hope you give this body lotion a try and see the difference.