Thursday, January 22, 2015

Master Bedroom Tour


Here is a sneak peak at our master bedroom! 
No painted walls and with an armchair in need of a sleep cover 

antique floor lamp is from the Tampa theater, FL.

Bedside tables are from pier one imports

Sconces are from pottery barn

Bedding is all from pottery barn

The antique snow shoes are for winter decor only. I have a 3 piece world map wall decor for the rest of the year. Pictures will follow

These handmade soaps are a christmas gift. Thank you Jennifer & Sarah Barefoot

Basket of collectible teak wood mini games


bedframe is from pottery barn


Any suggestions on wall color? Decor? 
I love antiques. 
I like keeping our room simple. 
I also like to mix wood colors as you can see.

Thank you for looking!


Friday, January 16, 2015

Knitted Fluted Cowl Pattern from Purl Bee


Okay, after taking a long break, I am back in knitting mode!

So that no one wanders where I have been for the last few weeks, I decided to post my last creation. A fluted cowl that I resized to fit my daughter. This pattern comes from www.purlbee.com. One of my favorite knitting websites. Although I did not use their wool and follow their measurements, I think it turned out pretty cute and soft. My daughter loves it and has been wearing it even though the weather here has not been that cold!

Here is Purl Bee's original Super Soft Merino Fluted Cowl

And here is mine
I know, not comparable at all! I absolutely Love the Purl Bee Cowl and will one day knit it exactly as it shows on the picture, but in the meantime, I will continue to practice my knitting skills with smaller versions. 

If you like this pattern, check it out here.
Their version wraps around three times which would make it too bulky and heavy on my 12 year old daughter so I decided to reduce the number of stitches casted on by two thirds as suggested in their comments and make it as wide as two yarn skeins would allow me. 
I used Loops and Threads Cozy Wool in the color "stone" and used the suggested U.S. 13 round needles. 

I ended up with a cowl that is 48 inches around and 7 inches wide. I only casted on 116 stitches instead of the 2/3 suggestion of 130 stitches because I was afraid to run out of yarn and not be able to find extra skeins.

I absolutely love the result. This is an easy pattern to knit but beginners, be aware! I do not recommend knitting this while watching TV! I had to constantly repeat the pattern in my head while knitting so not to make any mistakes. Maybe I will become more natural at it one day.

This is the right side of the pattern. Beautiful.

This is the inside of the pattern. Just as beautiful.


I have knitted a total of 8 scarves, cowls and 12 wash/dish cloths in 6 weeks and as a result, my little pinkies can barely bend without feeling pain but all of them are worth it!

If you like to knit and crochet, please send me your favorite websites and patterns. I would love to try them out.

Wednesday, January 7, 2015

Fresh and Delicious treats delivered to your door….


Are you familiar with Brigadeiros?

If you have a sweet tooth and a certain love for chocolate...

I have a real treat for you...

BRIGADEIROS

Renata Kuperus makes the best Brazilian Chocolate Candies ever!

And you know what else?

She can make them especially for you.

These delicious treats make wonderful wedding, birthday, office, holiday... party gifts.


Aren't they mouth watering?


Anyone living in the Wilmington, NC area can have a taste. Just email Renata and place your first of many orders.

Brigadeiros By Renata Kuperus
resilveira27@hotmail.com


Bon Appétit!

Wednesday, December 17, 2014

Photo Glass Ornament DIY


I have been giving these for Christmas for years!

Supplies:

Glass ornament
Transparency printable paper (make sure it is ink jet if that is the type of printer you have)
Printer
Circle cutter or scissors
Pencil

Instructions:

If you do not know the diameter of your ornament, you can find it by measuring its circumference and dividing it by pi (3.14).

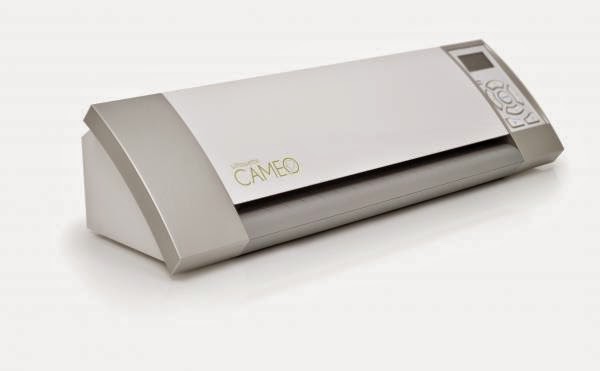
Choose a picture for your ornament and make sure the size fits the diameter of your ornament. What this means is that the subject needs to be centered so that the entire circle fits in the picture. You might have to enlarge or shrink the photo. I used to make these on a word document a long time ago by inserting an image on to my document and creating a circle the size of the circumference of the ornament. I would play with the size of the photo until it fit right in that circle. I then, deleted the circle I had drawn and hit the print button. I could fit up to 6 pictures on one sheet. The next step was just to manually cut each circle with the fiskars circle cutter. This part was a bit tricky and I sometimes had to start all over again. Figuring out where to position the cutter was a real headache! Having a silhouette cameo has been a time and life saver.

 
The picture on the left needs to be resized to fit the circle, the one on the right was perfect so I went ahead and used the intersect tool on the silhouette cameo to make anything outside the circle disapear.  There is no need to waist ink! 
All my pictures are now ready, I centered them to the page and inserted the registration marks for cutting. It is now ready to be printed

I like printing on transparency that way the photo can be seen on both sides of the ornament. Always print on the rougher side of the transparency.


Cut the picture using a fiskars circle cutter, your silhouette cameo or simply your scissors if you have steady hands. Mine are now cut with the help of my silhouette cameo. If you cut to photo too small it might roll around once in the ornament. If you cut it too big, it will bend a bit inside and won't look so good.

Roll the picture around a pencil

Insert the pencil in the ornament

Release the photo. At this point, you might have to adjust the picture around with tweezers. I always make sure I roll the photo around the pencil the way I want it to face in the ornament to avoid this type of tweaking.

Add the ornament cover and voila!


It can't get any simpler than this!

Friday, December 12, 2014

Christmas Decor

This is a time for decorating, sipping hot cocoa and warming up by a nice fire and I am doing just that today!


Christmas is almost here!

Handmade stockings. Thank you Betsy Barefoot


Snow balls


Silver and Gold

My favorite handmade ornament. Thank you Betsy Barefoot

Hubby's old train


Our Christmas Angel. Thank you Miss Joyce

Bells, bells and more bells

Foyer decor


Vintage skis


Felted Santa :-)

Simple Nativity Center. Thank you Betsy Barefoot

My latest craft. Bleached pine cones and glitter

Musical tree. Thank you Amy Barefoot